
What a Roof Inspection Includes (and What It Should Cost)
By RoofPredict Research TeamUpdated 60 min readMethodology
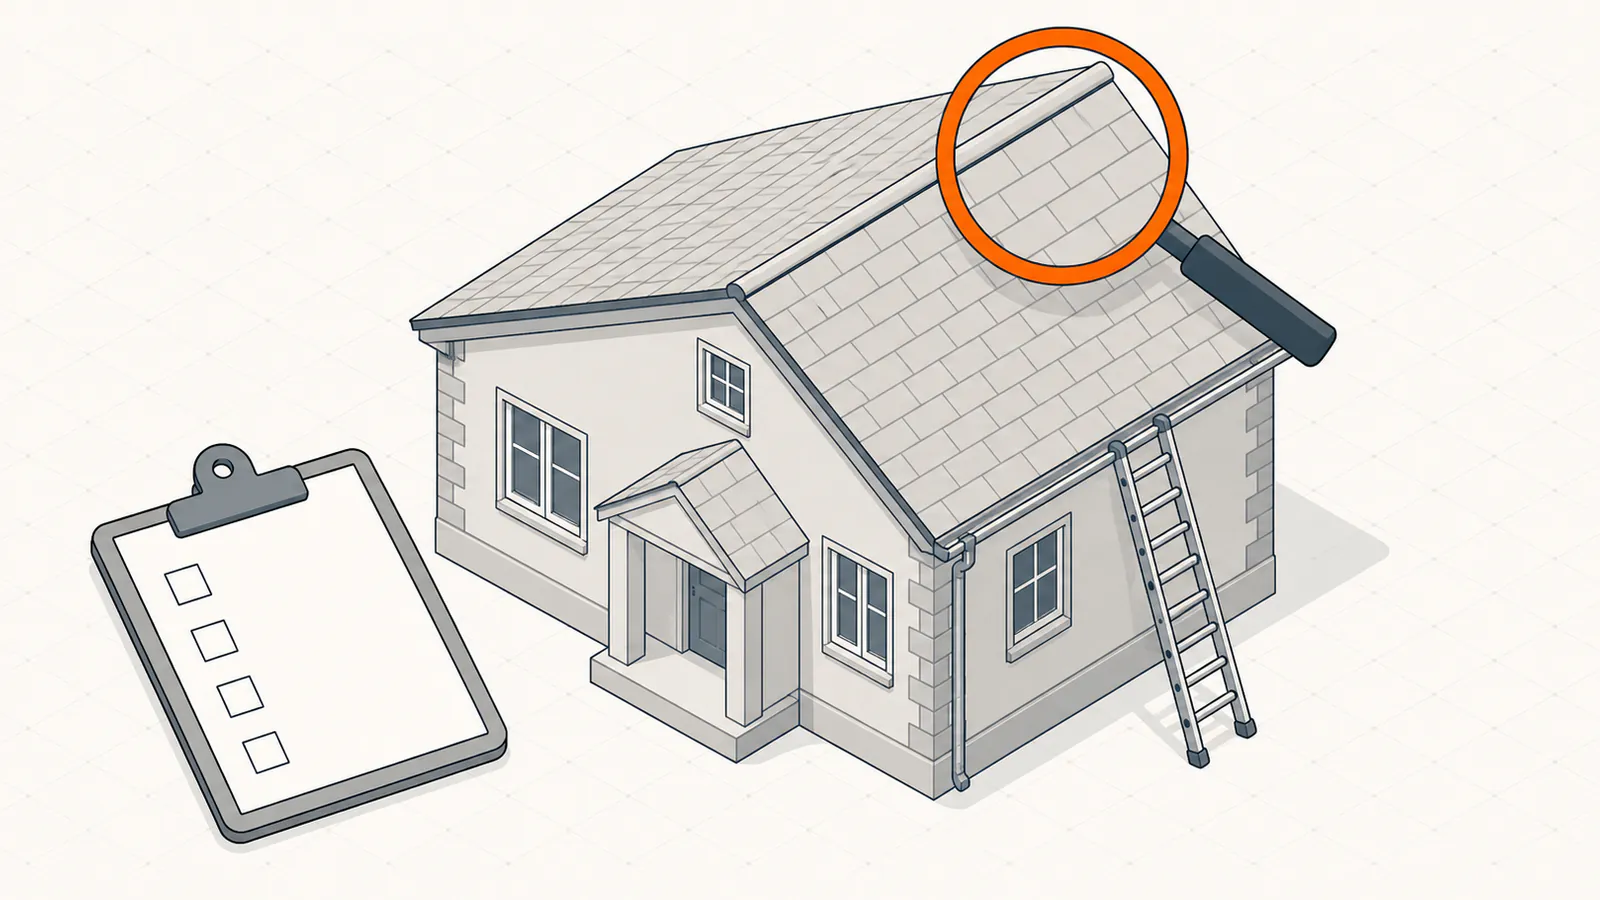
A complete roof inspection covers four zones: the shingle surface, the edges and valleys, the flashings and penetrations, and the attic underneath. It ends with a written, photo-documented report. Most take 45 minutes to two hours. Contractors often inspect free because they hope to win the job; independent inspections generally run about $100 to $400.
Key takeaways
- A complete roof inspection covers four zones (the surface, the edges and valleys, the flashings and penetrations, and the attic), and skipping the attic misses roughly half of what matters.
- Expect 45 minutes to two hours on site. Cost guides retrieved in August 2026 put paid independent inspections at roughly $100 to $400; contractor inspections are usually free because they double as estimates.
- The deliverable is a written report with dated photos, condition notes for every zone, a remaining-life range, and findings sorted into now, soon, and monitor.
- Who called whom is the fastest honesty test: an inspection you sought out from someone you vetted carries far less risk than one offered at your door after a storm.
- Never sign an assignment of benefits on the day of a free inspection. That paperwork hands control of your insurance claim to a contractor.
Want this answered for your property? Request a free Roof Report, then review the findings and open questions by phone with RoofPredict.
What does a roof inspection actually include?
A complete roof inspection is a systematic examination of the four zones where roofs actually fail (the shingle surface, the edges and valleys, the flashings and penetrations, and the attic underneath), followed by a written report with dated photographs, condition notes for each zone, an honest remaining-life estimate given as a range, and findings sorted by urgency. It typically takes 45 minutes to two hours for a single-family home. That one sentence is the standard this entire guide unpacks, and it is the standard to hold any inspection against, whether you paid for it or a contractor offered it free.
The reason the definition matters is that the word "inspection" gets used for very different things. A neighbor kid with a ladder looking for missing shingles is called an inspection. So is a fifteen-minute walk that ends with a replacement quote, a drone flight that produces forty photos and no interpretation, and a two-hour documented examination by a certified inspector who ends up telling you the roof is fine. Only some of those are worth your time, and from the ground they can look identical while they are happening. The differences show up in what was covered and what you receive at the end.
This guide walks through the whole experience in order: what a real inspection covers zone by zone, the different inspection methods and when each is appropriate, what it costs and who should pay, what the written report must contain, how to vet the person doing the work, the scams that dress up as inspections, and (the part most guides skip) what to actually do with the findings once you have them. None of it requires you to climb a ladder, and none of it assumes your roof has a problem. Most inspections, done honestly, end with some version of "you have time."
The short version
Insist on all four zones (surface, edges, penetrations, attic) and a written report with photos. Those two requirements alone filter out most bad inspections and nearly all fake ones.
The Four Zones of a complete inspection
Throughout this guide we organize the inspection the way experienced inspectors actually think about a roof: as four distinct zones, each with its own failure modes and its own place in the visit. We call this the Four Zones, and it is worth committing to memory, because it turns you from a spectator into someone who can judge an inspection while it is happening. A roof almost never fails in the middle of a slope for no reason. It fails where materials meet, where water concentrates, where the sun works hardest, and where nobody looks. Each zone captures one of those truths.
| Zone | What's in it | Why it gets its own zone |
|---|---|---|
| Zone 1: The surface | The field of shingles, tile, or metal across every slope, the part you can see from the street. | It ages in slow, readable patterns: granule loss, curling, cracking, hail bruises. It is where wear shows, but it is rarely where leaks start. |
| Zone 2: The edges | Eaves, rakes, drip edge, valleys, gutters, downspouts, fascia, and soffit: everywhere water is collected, turned, or handed off. | Water concentrates here. A valley carries many times the water of an open slope, and a failed edge rots the fascia and deck behind it quietly. |
| Zone 3: The penetrations | Everything that pokes through or interrupts the roof plane: chimneys, plumbing vents, skylights, exhaust fans, satellite mounts, solar attachments, and every roof-to-wall junction with its flashing. | Most leaks start here, at a cracked vent boot or a lifted flashing, not in the open field. Each penetration is a hole in the roof that a small piece of metal or rubber is keeping dry. |
| Zone 4: The structure and attic | The roof deck, rafters or trusses, insulation, ventilation, and everything visible from inside the attic. | The attic is where the roof's history is written (every past leak leaves a stain) and where its future is set, because ventilation and moisture problems in Zone 4 age Zones 1 through 3 from below. |
The Four Zones do two jobs for you. First, they are a completeness test. An inspection that covers only Zone 1 — and many quick ones do — has examined the zone where problems are most visible and least likely to be urgent, while skipping the three zones where leaks actually begin. If an inspector never asks where your attic hatch is, the inspection stopped at Zone 3 at best. Second, the zones are a reading guide for the report. A finding's zone tells you a lot about its meaning: Zone 1 findings are usually about remaining life and long-term planning, Zone 2 and 3 findings are usually about specific repairs with specific costs, and Zone 4 findings are usually about causes: the ventilation or moisture conditions quietly driving what shows up in the other three.
One more thing the framework makes clear: the zones fail at different speeds. Plumbing vent boots in Zone 3 commonly crack after ten to fifteen years, which is often a decade before the Zone 1 shingles around them are done. That mismatch is why a structurally sound mid-life roof can still leak, and why "the roof leaked" and "the roof is worn out" are different diagnoses with very different price tags. A good inspection keeps them separate. A sales pitch merges them.
The five inspection methods, from ground walk to infrared
Inspections differ less in what they look for than in how the inspector gets eyes on the roof. There are five common methods, and none of them is universally best. The right one depends on the roof's pitch, height, material, condition, and on why you want the inspection in the first place. A good inspector often combines two or three in one visit.
| Method | How it works | When it's the right call | Main limits |
|---|---|---|---|
| Ground-level visual | Binoculars or a zoom lens from the yard, sometimes a ladder set at the eaves; no one steps onto the roof. | Routine homeowner checks between professional visits; roofs too unsafe to walk; a quick triage after a storm. | Upper slopes and anything behind a ridge stay hidden, and there is no feel for soft decking. |
| Full roof walk | The inspector walks every accessible slope, photographs each defect, probes anything that feels soft, and checks fastening and sealant bond by hand. | Most walkable asphalt and metal roofs; pre-purchase decisions; insurance documentation where touch matters. | Unsafe on steep, wet, or frosted roofs; foot traffic can crack tile and slate and can scuff hot or brittle shingles. |
| Attic inspection | A flashlight examination of the roof deck, framing, insulation, and ventilation from inside the attic. | Every inspection, every time. It is the only view of the deck, of active leaks, and of the ventilation that sets the roof's aging speed. | Blocked by missing hatches, finished attic ceilings, or deep blown insulation with no walkway. |
| Drone survey | A licensed operator flies each slope and captures high-resolution photos and video, often stitched into a measured map. | Steep, high, multi-story, tile, slate, or storm-fragile roofs; full documentation with zero foot traffic. | No touch: a drone cannot feel a spongy deck, lift a tab to check sealant, or probe suspect wood. Airspace rules apply near airports. |
| Infrared / moisture scan | A thermal camera reads surface temperature differences that reveal moisture trapped below, usually scanned after sunset; moisture meters confirm. | Flat and low-slope roofs; chasing a leak that shows inside but has no visible entry point; documenting wet insulation. | Needs the right weather and timing, and results take training to read. Rarely necessary on an ordinary pitched shingle roof. |
A few notes that the table can't hold. On drones: any operator flying commercially (which includes every paid roof inspection) is required by the FAA to hold a remote pilot certificate under its Part 107 rules, so "are you a licensed drone operator?" is a fair and useful screening question. A good drone survey is a legitimate full inspection of Zones 1 through 3 and, paired with a thorough attic check, covers most of what a walk would find. What it cannot replace is touch: the soft give of rotten decking underfoot, the tug that shows a shingle never sealed. If a drone inspector finds something suspicious, the right next step is often a targeted walk or a probe of that one spot, not a shrug.
On infrared: the physics is simple. Wet materials hold the day's heat after sunset while dry ones shed it, so a thermal camera at dusk can map moisture that is invisible at noon. It is standard practice on commercial flat roofs and genuinely useful on residential low-slope sections and on stubborn leaks that will not show a path. It is overkill for a routine checkup on a pitched shingle roof, and it is worth being skeptical of anyone who leads with a thermal camera on a roof that does not need one; the colorful images are persuasive to homeowners in a way that plain photographs are not, which makes them a favorite prop.
And on the roof walk itself: refusing to walk a roof is sometimes the mark of a good inspector, not a lazy one. Wet wood shingles, frost-slicked metal, brittle 20-year-old three-tabs on a cold morning, unsupported tile. An experienced inspector knows which roofs punish footsteps and switches to a ladder-and-drone approach. The method should always be stated in the report, along with why it was chosen. What you are owed is coverage of all four zones by some competent means, not a particular athletic performance.
Zone 1: what the inspector checks on the surface
Zone 1 is the field: the expanse of shingles, tile, or metal that makes up most of the roof's area and nearly all of what you can see from the street. On an asphalt roof, which is what most American homes have, the inspector is reading the surface for about eight distinct conditions, and reading them per slope, because slopes age at different speeds. South- and west-facing slopes take more sun and usually wear years faster than north-facing ones; a slope under a tree line wears differently than an open one. Uniform wear across all slopes says age. Wear concentrated on one slope says sun, shade, or a storm that arrived from one direction. Those are different conversations.
| Surface finding | What the inspector sees | What it usually means |
|---|---|---|
| Granule loss | Bald or shiny patches on shingles; granules accumulating in gutters and at downspout splash blocks. | Light, even shedding is normal for the roof's whole life. Heavy or accelerating loss means the shingles' UV armor is going, and aging speeds up from there. |
| Curling and clawing | Shingle edges turning upward (curling) or centers humping while edges stay down (clawing). | Heat- and age-driven drying of the asphalt. A late-life sign that is not repairable: it marks the planning-for-replacement stage. |
| Cracking and splitting | Surface craze-cracks, or clean splits running through shingles. | Thermal cycling and age. Brittle shingles shed tabs in the next real windstorm, so this finding raises urgency. |
| Blistering | Small raised bubbles, some popped with granules missing at the crater. | Usually a manufacturing or venting-related condition. Intact blisters are a watch item; open ones are exposed asphalt and age fast. |
| Hail bruising | Dark round marks that feel soft under a fingertip, often with a spatter of displaced granules. | Impact damage: an insurance question, not a wear question, and the reason storm inspections are documented differently. |
| Missing or lifted shingles | Gaps in the field, flapping tabs, exposed nail lines, tabs in the yard. | Wind damage or failed factory sealant. Very repairable caught early; a steady leak source ignored. |
| Nail pops | Small raised bumps in the shingle surface, sometimes in lines, from fastener heads backing out. | An installation or deck-movement issue. Each one is a future puncture and leak path, and a cluster hints at a nailing problem across the roof. |
| Moss, algae, and debris | Black streaking (algae), green cushions (moss), and piled leaves or needles in valleys and behind chimneys. | Algae streaking is largely cosmetic. Moss holds water against the shingles and lifts edges, a real problem in wet climates. Debris dams water wherever it piles. |
Two hands-on checks separate a thorough Zone 1 examination from a photographic one. The first is the sealant-bond check: on an asphalt roof, each shingle is glued to the one below it by a factory adhesive strip that activates in the sun, and that bond (not the nails) is what resists wind. An inspector may gently lift a tab or two in a discreet spot to see whether the bond ever formed and whether the shingle has gone brittle. Done carefully on a warm day this is harmless; done aggressively on a cold one it creates the damage it claims to find, which is why the technique also appears later in the scam section. The second is the underfoot read: soft, spongy travel over a section of roof points to delaminating or rotten decking below, which no camera can detect.
On tile, slate, wood, and metal roofs the checklist changes vocabulary but not logic. Tile and slate: cracked, slipped, or missing pieces, and, more important, the age and condition of the underlayment beneath, which is usually what actually fails. Wood shakes: splitting, cupping, rot, and moss. Metal: seam and fastener condition, gasket washers that have dried and cracked, coating chalking or rust bloom, and sealant at every termination. In every case, the inspector is answering the same two questions about Zone 1: how much life is left in the surface, and is anything in it letting water through right now? Those answers usually come back separately, and they should.
Zone 2: edges, valleys, and gutters
Zone 2 is everything at the perimeter and the folds, the places where water is collected, turned, and handed off the roof. It gets its own zone because water concentrates here. An open slope sheds rain in a sheet; a valley collects two slopes' worth into a single channel, and the eave edge receives everything the whole roof gathered. Small defects that would be harmless mid-slope become chronic leaks at the edges, and the damage they cause — rotted fascia, stained soffits, saturated deck edges — hides behind trim where nobody looks.
- Drip edge and starter course. The metal drip edge should carry water past the fascia into the gutter, and the first course of shingles should sit on a proper starter strip. Missing drip edge (common on older roofs and cut-rate reroofs) lets water curl back under the shingle edge and rot the deck's first foot.
- Eaves and rakes. The inspector sights along the edges for waviness (a sign of deck or fascia trouble underneath), checks for wind-lifted edge shingles, and looks for the dark staining that means water has been running behind the gutter instead of into it.
- Valleys. Whether open metal, woven, or closed-cut, valleys carry the roof's heaviest flow and fail from debris dams, rust, cracked shingles along the centerline, debris dams, and fasteners placed too close to the channel. A leaf-packed valley in fall is one of the most common self-inflicted roof wounds in wooded neighborhoods.
- Gutters and downspouts. Checked for slope, secure hangers, seams, rust, and, diagnostically, for what has collected inside. A thick bed of granules in the gutters is a direct readout of Zone 1 wear. Overflow marks and tiger-striping on the gutter face mean water is going where it shouldn't.
- Fascia and soffit. Probed for softness and peeling paint, which mark chronic overflow or ice damming. Soffit vents are checked for paint-over and insulation blockage; they are Zone 4's air intake, and a blocked soffit quietly disables the attic ventilation.
- Kick-out flashing. Where a roof edge dies into a wall (over a garage, at a porch), a small angled flashing should kick water into the gutter instead of letting it run down inside the wall. Missing kick-outs are among the most damaging and most-missed defects in residential construction, and a good inspector checks every roof-wall termination for one.
In cold climates, Zone 2 is also where ice dams live, and the inspector reads the evidence even in July: rusted or torn gutters, granule scour lines a few feet up from the eave, interior stains on ceilings below the roof edge, and whether an ice-and-water membrane was installed at the eaves during the last reroof (often visible from the attic). Ice dams are usually a Zone 4 disease (heat escaping into the attic melts snow that refreezes at the cold eave) with Zone 2 symptoms, which is a good example of why an inspection that treats each zone in isolation misses the story.
Zone 2 findings are, on the whole, good news as roofing goes: they are usually specific, local, and repairable for hundreds rather than thousands of dollars: a run of drip edge, a re-flashed valley, a kick-out added, gutters re-hung. The catch is that they are only cheap while they are young. A missing kick-out that has fed a wall for five years is no longer a flashing repair; it is a siding, sheathing, and sometimes mold remediation project. This is the zone where inspection intervals earn their keep.
Zone 3: flashings and penetrations
Zone 3 is every place something interrupts the roof plane: chimneys, plumbing vents, exhaust fans, skylights, satellite dishes, solar mounts, and every wall a slope runs into. Each one is, bluntly, a hole in your roof that a small piece of metal or rubber is keeping dry. Roofers have a saying that leaks happen at the holes you made on purpose, and the claims experience backs the folk wisdom: when a structurally sound roof leaks, the origin is usually in this zone. That makes Zone 3 the highest-value fifteen minutes of the entire inspection.
| Penetration | What the inspector checks | How it usually fails |
|---|---|---|
| Plumbing vent boots | The rubber or neoprene collar sealing each vent pipe, checked for cracks and for pull-away from the pipe. | The rubber dries and cracks in the sun; roofers commonly find boots failing after 10 to 15 years, long before the shingles. One of the cheapest, most frequent roof repairs there is. |
| Chimney flashing | Step flashing woven into the shingles up each side, counter-flashing let into the mortar joints over it, and a cricket (a small peaked diverter) behind wide chimneys. Model building codes generally require one behind chimneys wider than about 30 inches. | Counter-flashing that was surface-caulked instead of set into the mortar fails as the caulk ages; missing crickets let debris and water pond against the chimney's uphill face. |
| Skylights | The factory flashing kit, the seal between glass and frame, and the shingle weave around the curb; inside, the drywall well below is checked for staining. | Old or site-improvised flashing, failed seals fogging the glass, and sealant-only repairs that buy a year at a time. Skylights installed decades ago often get reflashed or replaced during a reroof. |
| Vents and fans | Box vents, ridge vents, turbines, and kitchen/bath exhaust caps: bases sealed, fasteners tight, dampers moving, no crushed or disconnected ducts. | Cracked plastic vent bases, hail-split covers, and exhaust caps whose flappers have stuck open (weather in) or shut (moist air trapped). |
| Roof-to-wall junctions | Continuous or step flashing wherever a slope meets siding or a second story, with siding clearance above the shingles. | Step flashing omitted or face-nailed, or buried under new siding without integration. Slow, wall-staining leaks that are misdiagnosed for years. |
| Mounts and attachments | Satellite dishes, solar standoffs, holiday-light hardware, satellite brackets, and abandoned antenna mounts, with each fastener location sealed and flashed rather than just screwed and caulked. | Lag bolts driven through shingles with a dab of sealant. Abandoned mounts are pure liability; a good report flags every one for removal and patching. |
Notice what runs through that whole table: caulk. The recurring finding in Zone 3 is sealant doing a job that metal should be doing. Caulk and roofing cement are maintenance materials with a service life of a few years; step flashing and counter-flashing are installation materials with a service life of decades. A roof whose penetrations are ringed with thick, layered, multi-colored sealant is a roof that has been patched repeatedly instead of flashed properly, and an honest report will say so, not because the roof is doomed but because you should budget for real flashing work rather than another tube of caulk.
Zone 3 is also where an inspection earns its keep on newer roofs. A five-year-old roof has essentially no Zone 1 wear, but it can absolutely have a cracked boot from a cold snap, a satellite mount from the previous owner, or a chimney that was never counter-flashed correctly in the first place. If you have ever heard "but the roof is practically new!" from someone with a ceiling stain, Zone 3 is usually the answer to the riddle.
Zone 4: inside the attic
Zone 4 turns the inspection inside out. From the attic, the inspector is looking at the underside of the roof deck (the plywood or plank sheathing the shingles are nailed to) plus the rafters or trusses holding it up, the insulation on the attic floor, and the ventilation moving air through the space. This is the zone most quick inspections skip, and it is the one we would keep if we could keep only one. The surface tells you how the roof looks. The attic tells you what the roof has done.
- The daylight test. With the lights off, pinpoints of daylight through the deck mark open holes, often at missing shingles, ridge gaps, or old fastener penetrations. (Light at soffit and ridge vents is normal and good.)
- Stains and water trails. Every leak the roof has ever had left a brown-edged map on the sheathing or a dark trail down a rafter. The inspector follows each stain uphill to its origin (almost always a Zone 3 penetration) and judges whether it is active: dark, damp, or glistening means now; pale and crusty means history. A moisture meter settles arguments.
- The deck itself. Sagging between rafters, delaminating plywood, dark water tracks, and soft spots probed with a screwdriver. In many hail-belt and coastal reroofs, the inspector also notes deck thickness and fastening, which matter for wind performance and for programs like IBHS's FORTIFIED standard.
- Rusted nail tips and frost. Hundreds of rusty fastener points, or frost on the deck's underside in winter, mean humid indoor air is condensing in the attic: a ventilation and air-sealing problem that mimics a roof leak and rots decks from the inside.
- Mold and biological growth. Gray-black staining across the north-facing deck or in corners marks chronic condensation; localized fuzzy growth below a penetration marks a slow leak. The distinction matters because the fixes are completely different.
- Insulation. Depth, evenness, and condition. Compressed, matted, or tide-marked insulation records past water. The Department of Energy's guidance for most U.S. climates calls for attic insulation in roughly the R-38 to R-60 range (many older homes have half that), and thin insulation feeds the ice-dam cycle in cold climates.
- Ventilation, intake and exhaust. Soffit vents actually open (not painted over or buried in insulation), baffles holding a channel above the insulation, and a matched exhaust path at ridge or gable. Model codes generally size attic ventilation at about 1 square foot of net free vent area per 150 square feet of attic floor, reducible to 1-in-300 when conditions are met. An attic that bakes because its ventilation is blocked cooks the shingles above it from below.
- Exhaust fans. Bathroom and kitchen fans must duct through the roof or wall, not into the attic. A bath fan dumping steam into the insulation is one of the most common defects in American attics and a prolific creator of fake "roof leaks."
Zone 4 is also where causes live. Ice dams at the eaves, blistering shingles, frost on winter nail tips, a roof aging five years faster than its neighbors: the mechanism behind each is usually visible from the attic as blocked intake vents, missing baffles, escaping household air, or absent insulation. This is why an inspection without an attic check cannot honestly estimate remaining life: two identical roof surfaces, one over a dry well-ventilated attic and one over a humid stagnant one, are not the same age in any way that matters.
The attic check is also where good news comes from
A clean deck, dry insulation, and clear airflow upgrade every other finding. Surface wear over a healthy attic often means "plan in a few years"; the identical wear over a compromised attic can mean "plan now." Homeowners who dread inspections tend to imagine the attic as where bad news hides — just as often, it is where a middle-aged roof earns a longer forecast.
A roof inspection, step by step
Knowing the sequence of a well-run inspection lets you judge thoroughness in real time instead of afterward. The order varies a little by inspector, but the visit should recognizably contain these seven steps.
- The interview. A good inspector starts with questions: How old is the roof? Has it leaked, and where? Any insurance claims, repairs, or previous reports? What have you noticed? Have your answers and any paperwork ready; the history changes what they look for.
- The ground walk-around. Every slope viewed from the yard, often with binoculars: overall wear pattern, obvious damage, sagging lines, and the state of gutters, fascia, and soffits. Many inspectors photograph each elevation from the ground before going up.
- Getting eyes on the roof. A walk, a ladder-at-the-eaves examination, a drone flight, or some combination, chosen for the roof's pitch and condition. This is the Zone 1–3 sweep: every slope, every edge and valley, every flashing and penetration, each defect photographed close-up and wide.
- Hands-on checks where they matter. Lifting a tab to test sealant bond, probing suspect wood, flexing a vent boot, checking fastener tightness on metal: the touch tests a camera cannot do, done sparingly and gently.
- The attic examination. Deck, stains, insulation, ventilation, exhaust ducting: the full Zone 4 list, with photos. Expect the inspector to ask for hatch access early and to spend 15 to 30 minutes inside a typical attic.
- The on-site debrief. A walk around the house with you, pointing out what was photographed and a preliminary read: anything urgent, anything to watch, overall impression. Honest inspectors flag uncertainty here rather than papering over it.
- The written report. Delivered typically within one to three business days: photos tied to locations, condition by zone, a remaining-life range, and prioritized recommendations. The visit was the data collection; this document is the product you keep.
Two useful observations about the sequence. First, the interview and the attic bracket the visit for a reason: they are the steps that require nothing but diligence, so they are the first things a low-effort inspection drops. Second, the debrief is where sales pressure appears if it is going to: a professional summarizes and leaves; a salesperson summarizes and reaches for paperwork. You never need to sign anything on inspection day, not an estimate, not a contingency agreement, and, as we cover later, absolutely not an assignment of benefits.
How long does a roof inspection take?
For a typical single-family home, a complete four-zone inspection runs about 45 minutes to two hours, including the attic and the debrief. Time scales with roof area, pitch, complexity (every dormer, valley, skylight, and chimney adds minutes), attic accessibility, and how much documentation the purpose demands: an insurance-grade storm inspection that chalks and photographs test squares on every slope takes longer than an annual checkup.
| Scenario | Typical on-site time | What drives it |
|---|---|---|
| Simple one-story ranch, walkable pitch | 45–75 minutes | Small area, easy access, usually a straightforward attic. |
| Two-story home with complex rooflines | 1.5–2+ hours | Multiple slopes and transitions, more Zone 2 and 3 detail, ladder repositioning. |
| Drone survey | 30–60 minutes on site | Flight time is short; image review and reporting happen afterward. |
| Storm-damage documentation | 1–2+ hours | Test squares chalked and photographed per slope, collateral damage logged around the whole property. |
| Infrared moisture scan | 1–2 hours, usually at dusk | Waiting for the right thermal conditions is part of the method. |
| Pre-purchase roof inspection | 1–2 hours | Buyer-grade documentation of all four zones plus time for your questions. |
The extremes are the tell. Fifteen minutes is enough time to confirm a roof looks old and to start a pitch; it is not enough time to inspect one. At the other end, an inspector still "finding problems" after three hours on an ordinary house deserves gentle skepticism too. Thoroughness produces a longer report, not an ever-growing verbal list. In both cases the written report settles it: time on site is a proxy, and the documentation is the evidence.
Start with the property evidence and a personal walkthrough. If an on-site look would improve the answer, RoofPredict can explain what should be checked and may assign one network professional.
How much does a roof inspection cost in 2026?
There are two honest price points for a roof inspection: free, and roughly $100 to $400. Free is what most roofing contractors charge, because for them the inspection is the front end of an estimate, a normal and legitimate business practice we examine closely in the next section. Paid is what independent inspectors charge for an assessment with no repair work attached, and home-services cost guides from Angi and HomeAdvisor, retrieved August 2026, generally put that standalone service at roughly $100 to $400 depending on the market, the roof's size and pitch, and the method involved. Specialized work costs more.
| Service | Who performs it | Typical price | Best for |
|---|---|---|---|
| Contractor inspection | A roofing company's estimator | Usually free | Getting a repair or replacement bid from a company you chose and vetted. Understand it doubles as a sales visit. |
| Independent roof inspection | A dedicated roof inspector or roof consultant | Roughly $100–$400 | A neutral read before a big decision: buying a home, disputing a claim, weighing repair against replacement. |
| General home inspection (roof included) | A home inspector, during a sale | Roughly $300–$500 for the whole house | Buying or selling. Ask specifically how the roof was observed; standards allow reporting from the ground. |
| Drone roof survey | An inspector or contractor with an FAA-certificated operator | Roughly $150–$400 standalone | Steep, high, tile, slate, or fragile roofs that should not be walked; documentation without foot traffic. |
| Infrared / moisture scan | A specialist, most often on flat or low-slope roofs | Often $400 and up | Locating trapped moisture and mystery leaks; rarely needed on ordinary pitched shingle roofs. |
| Roof certification | A roofing contractor or inspector | Roughly $75–$300 plus any required repairs | Lenders and buyers who want a written statement that the roof should last a stated period, commonly two to five years. |
How to think about the money: an independent inspection costs about as much as a nice dinner out, and it typically sits in judgment over decisions three or four orders of magnitude larger: a five-figure replacement, a home purchase, an insurance claim. Paying a few hundred dollars to make a $15,000 decision with neutral information is one of the better trades in homeownership. The corollary is just as important: the expensive version of a free inspection is the one that talks you into a roof you did not need, and that version costs more than every paid inspection you will ever buy.
A few pricing wrinkles worth knowing. Some independent inspectors credit the inspection fee toward consulting work if you hire them to review bids afterward. Home inspectors often offer a roof-only service at less than a full home inspection. Storm-damage documentation for an insurance dispute may be priced higher than a routine inspection because the reporting burden is heavier. And if a "free" inspection comes with a fee that appears only if you decline the repair pitch, that fee is a pressure tactic, and it belongs in the scam section below.
Free contractor inspection or paid independent one: which should you choose?
This is the conflict-of-interest question, and it deserves an honest treatment rather than a cynical one. A roofing contractor who inspects your roof for free is not running a con; they are pricing a potential job, exactly the way a mechanic looks at your car before quoting the brakes. Many contractor inspections are thorough, well-documented, and end with "it's fine, call us in a few years". Companies that depend on local reputation know that honest no-sale visits are how they earn the eventual yes. The conflict of interest is real, but it is structural, not personal: the person assessing whether you need work is paid only if you do. That should shape how you read the report, not whether you trust the profession.
The cleanest way to decide who should inspect is what we call the Who-Called-Whom Test, and it has two parts. Part one: who initiated the contact? An inspection you sought out — from a contractor you shortlisted or an inspector you hired — starts from your judgment. An inspection that arrived at your door, especially after a storm, starts from someone else's sales territory map, and everything that follows should be read in that light. Part two: who profits from the finding? A paid independent inspector earns the same fee whether your roof needs everything or nothing; a contractor's estimator earns the job or doesn't. Neither answer disqualifies anyone. Together they tell you how much independent verification a given recommendation deserves before you act on it.
| Situation | Trust posture | Sensible next step |
|---|---|---|
| You called a vetted contractor for a known problem | High for the diagnosis, moderate for the scope | Accept the finding; get a second bid if the proposed scope is replacement or a four-figure repair. |
| You called a paid independent inspector | High for both diagnosis and scope | Use the report to define the work, then collect contractor bids against it. |
| A contractor you invited recommends full replacement | Moderate: honest and premature replacement pitches look identical | Worth a few hundred dollars of independent confirmation before a five-figure commitment. |
| A door-knocker offers a free inspection after a storm | Low until proven otherwise | Don't let them on the roof. Get your own inspector or vetted local contractor up first; see the scam section below. |
A practical rule that falls out of the table: let the size of the decision set the independence of the advice. For a cracked vent boot or a handful of wind-lifted shingles, a free inspection from a reputable local roofer is proportionate — the downside of a slightly padded scope is small. For a repair-versus-replace decision, an insurance dispute, or a home purchase, the money at stake justifies a paid, independent set of eyes whose only product is the truth as they see it. Many homeowners use both in sequence: an independent inspection to define what is actually needed, then contractor bids (vetted the way our contractor guide describes) to price exactly that scope. Bids against a defined scope are comparable; bids against "whatever you think it needs" are not.
One caveat in the interest of fairness: independence is not infallibility. Independent inspectors have their own mild incentives: findings justify the fee, and referral relationships exist in every trade. And an independent generalist may know less about, say, tile flashing details than a 30-year tile roofer does. Independence buys you an unconflicted opinion, not a guaranteed correct one. The strongest position is still the boring one: a written report from someone with nothing to sell, tested against a written bid from someone who does the work, with you reading both.
The written report and its five essential parts
The report is the product.
The visit, the ladder, the drone: all of it is data collection for a document you can hand to an insurer, a buyer, a contractor, or your future self. A verbal "you've got a few years left" is pleasant and worth almost nothing the moment the inspector drives away. Judge any report against what we call the Five-Part Report Standard; a report missing any part is incomplete, and a report missing several was never really an inspection.
| Part | What it includes | Why it matters |
|---|---|---|
| 1. Method and metadata | Date, address, weather during the visit, how the roof was observed (walked, ladder, drone, ground), what was inaccessible and why, and the inspector's name, company, credentials, license number where one applies, and contact details. | A finding means something different from a walk than from the ground. Inaccessible areas honestly disclosed beat silent gaps. |
| 2. Photo evidence | Dated photographs of every slope and every noted defect, each defect shot close-up and wide, with its location identified on a diagram or in a caption. | Photos make findings verifiable by a second opinion, an adjuster, or a buyer. The close-and-wide pairing is what makes a photo checkable rather than merely dramatic. |
| 3. Condition by zone | Notes and a condition rating for each of the Four Zones: surface, edges, penetrations, attic; plus roof type, approximate age if known, layers, and pitch. | Zone-by-zone structure is the completeness proof. "Roof is in fair condition" as a whole tells you nothing you can act on. |
| 4. Remaining-life range | An honest estimate of remaining service life given as a range, with wear, storm damage, and installation defects clearly distinguished. | The distinction drives everything: wear is a budgeting question, storm damage is an insurance question, and install defects can be a warranty question. |
| 5. Prioritized findings | Recommendations sorted into now, soon, and monitor, with rough cost context where appropriate; for storm work, impact counts or maps per test square on each slope. | Priorities turn a list of defects into a plan. A report where everything is urgent is a sales document wearing a report's clothes. |
A note on the remaining-life estimate, since it is the number homeowners most want and inspectors most hedge. A range is the honest form of that answer. Nobody can inspect the inside of a shingle, and the difference between the low and high end of "3 to 7 years" is usually weather that has not happened yet. What you should expect is a range with reasoning attached: which zone drives the estimate, what would move it shorter, what the inspector would recheck and when. A single confident year ("this roof has exactly 2 years left") deserves more suspicion than a thoughtful range, especially when it arrives stapled to a replacement quote.
Red flags in the report itself: photos so tight you cannot tell what roof they are from (or whether they are from your roof at all); "needs full replacement" with no zone-by-zone support; every finding rated urgent; boilerplate paragraphs that clearly ship with every report; and no mention of the attic anywhere. Any one of these is a reason to get a second opinion before spending money, and the beauty of a written report is that a second opinion can review it directly.
What an inspection cannot tell you
Two limits are worth stating plainly, because they set expectations for the document you are about to read. Nobody can see inside a shingle, so a remaining-life estimate is informed judgment rather than measurement. And no amount of time on a ladder reveals what a tear-off reveals: sheathing condition between the rafters, the state of the underlayment, and anything buried under a second layer of shingles all stay hidden until the roof comes off. Good reports say so in as many words. When a report speaks with more certainty than its method supports, that overconfidence is itself a finding, and it is about the inspector rather than the roof.
When a report speaks with more certainty than its method supports, that overconfidence is itself a finding.
What credentials should a roof inspector have?
No single license makes someone a good roof inspector, and the credential landscape is genuinely confusing: roof inspections are performed by home inspectors, roofing contractors, independent roof consultants, and insurance-side specialists, each carrying different letters. What follows is a translation guide: what each credential actually attests, and what none of them can.
- Home inspector licensing and associations. Most states license home inspectors, but requirements vary widely and a handful of states have no licensing at all. Membership in InterNACHI or ASHI adds a published standard of practice and continuing education. Relevant caveat: those standards require describing the roof but generally do not require walking it.
- HAAG certification. A training credential focused specifically on damage assessment, distinguishing hail and wind damage from wear and from mechanical damage. It is the credential most relevant to storm and insurance inspections, and it is held by inspectors and adjusters on both sides of claims.
- Roofing contractor licensing and affiliations. Contractor licensing is state-by-state and attests to the business, not to inspection skill; NRCA membership signals engagement with the industry's standards body. For an estimator, years on roofs in your region often matter more than letters.
- Insurance and liability basics. Whoever gets on your roof should carry general liability insurance, and any company sending employees up should carry workers' compensation. Ask for certificates; a fall on your property is your problem if they are uninsured.
- Drone certification. Any paid drone flight requires an FAA remote pilot certificate (Part 107). Uncertificated "free drone inspections" tell you how the operator treats rules generally.
- FORTIFIED evaluators. If you are pursuing an IBHS FORTIFIED designation for wind resistance (increasingly relevant in coastal and hail-prone states, where it can earn insurance credits) the evaluation must be done by a certified FORTIFIED evaluator, a specific trained role.
What no credential attests: honesty and thoroughness on your particular Tuesday. Credentials mean the person was trained to a recognized standard and has something to lose, which is worth real weight. But the strongest predictors of a good inspection remain behavioral, and you can observe them yourself: they asked for your roof's history, they went into the attic, their sample reports are photo-rich and zone-organized, and they were content to leave without a signature. A modestly credentialed inspector who does all four beats a heavily lettered one who does none.
What questions should you ask a roof inspector?
Ten minutes of questions (five when booking, five at the debrief) will do more for the quality of your inspection than anything else in this guide. Good inspectors answer all of these easily and tend to like being asked; evasion on any of them is itself a finding.
- Before booking: What method will you use on my roof, and will the attic be included? (The right answer names a method and always includes the attic if it is accessible.)
- Before booking: What does the report look like, and can I see a sample? (You are checking it against the Five-Part Report Standard: photos, zones, a life range, priorities.)
- Before booking: What are your credentials, and are you insured? (Licensing as applicable, liability coverage, HAAG if it is a storm question, Part 107 if a drone is involved.)
- Before booking: Do you also perform repairs, and if so, how do you handle the conflict? (An honest contractor names it plainly; an independent inspector should confirm they have no stake in the repair work.)
- Before booking: What is the fee, what does it include, and when do I get the report? (A number, a scope, and a delivery window; vagueness on all three predicts vagueness throughout.)
- At the debrief: Which zone concerned you most, and why? (Fluency in specifics is the fastest read on thoroughness.)
- At the debrief: Of what you found, what is wear, what is damage, and what is an installation defect? (The three have different money attached: budget, insurance, and warranty respectively.)
- At the debrief: What would you fix now, what would you watch, and when would you look again? (You are asking for the priority triage in plain words.)
- At the debrief: What is your remaining-life range, and what would move it? (A range with reasoning is the honest shape of this answer.)
- At the debrief: If this were your house, what would you do next? (Not binding, but consistently revealing.)
One question you should be ready to answer in return: what do you want out of the inspection? "I think I have a leak," "I'm deciding whether to repair or replace," "my insurer wants documentation," and "I'm buying this house" are four different jobs with different documentation needs. Telling the inspector which one you are hiring for gets you a report built for its actual use.
Preparing for the visit
Preparation is light, but the little there is meaningfully changes what the inspection produces. Everything on this list is about the same thing: giving the inspector the roof's history and full access to its evidence.
- Establish the roof's age if you can. Closing documents, permit records, neighborhood reroofing history, and dated roof imagery will usually pin it down; our roof lifespan guide walks through the methods in order of reliability. An inspector who knows the age reads every finding more accurately.
- Gather the paper: permits, warranties, prior inspection reports, repair invoices, warranty paperwork, and any insurance claim history. A folder that took you twenty minutes to assemble can save the inspector an hour of guessing.
- Clear the attic hatch and a path to it. Move the closet boxes, note where the access is, and mention anything unusual: no flooring, deep blown insulation, a second hatch over the garage.
- Write down what you have noticed, with dates if you have them: the stain that appears after wind-driven rain, the granules at one downspout, the flapping sound from the northeast corner. Symptoms with timestamps are diagnostic gold.
- Make the outside reachable: unlock gates, move vehicles away from ladder set points, clear the attic hatch, and plan for pets to be inside.
- Plan to be home, and to walk the ground at the debrief. Ten minutes of pointing — "this photo is that vent" — will make the written report ten times more legible to you later.
And when the report arrives, file it with your house records and keep it forever. Inspection reports appreciate: today's report is next year's baseline, the "before" picture for a future storm claim, and documentation for a future buyer. A folder of dated roof reports is one of the quietest forms of home equity there is.
What roof inspection scams should you watch for?
The roof is the one major component of your house you cannot easily verify for yourself, and dishonest operators have built an entire seasonal industry on that fact. Consumer alerts from the FTC, state insurance regulators, and the NAIC describe the same handful of patterns year after year, concentrated in the weeks after hailstorms and named storms. The full storm-chaser playbook, and how to run a legitimate claim, lives in our storm damage claims guide; here we cover the versions that specifically wear an inspection as a disguise.
| Tactic | What it sounds like | Your move |
|---|---|---|
| The post-storm free-inspection knock | "We're working on your neighbor's roof and noticed possible damage. We can take a look for free right now." | Take the flyer and keep them off the roof, then schedule your own inspector. Anyone can claim damage they were never up there to see, and some create it once they are. |
| Fabricated damage | Photos of creased tabs, scuffed granules, or circular "hail hits" that appeared only after someone was on your roof. | Your inspector goes first after storms. If someone else must go up, ask to watch the drone feed or ground-observe, and compare their photos against your baseline report. |
| Recycled or misattributed photos | Dramatic damage photos with nothing identifying your roof: no wide shots, no landmarks, no context. | Ask for every close-up paired with a wide shot locating it on your roof. Honest documentation always has both; borrowed photos never do. |
| The assignment-of-benefits push | "Sign this so we can deal with your insurance company for you. It just cuts the red tape." | Don't sign. An assignment of benefits transfers control of your claim to the contractor. Whatever an AOB might do in careful hands, inspection day is never the day. |
| Deductible "waivers" | "We'll cover your deductible. The roof ends up free to you." | Decline and end the conversation. Eating the deductible generally means inflating the claim to hide it, which is insurance fraud with your name on the paperwork. |
| The vanishing time limit | "This price, and your claim window, expires today. I just need a signature before I leave." | No legitimate finding evaporates overnight. Real claim deadlines are set by your policy and state law, not by a stranger's clipboard. Urgency is the product being sold. |
Storm response is real work, and legitimate roofing companies may canvass affected neighborhoods. The homeowner still begins with less information in a door-knock scenario: you did not choose the company, you have not yet verified its findings, and its paperwork was prepared before the conversation. Use the Who-Called-Whom Test to slow the decision down. Verify the business, request the findings in writing, and get a second opinion before signing. A professional company can work within that process.
The single best protection
Choose your inspector; never let the inspector choose you. A baseline report from someone you vetted — filed away before any storm — is the antidote to nearly everything in the table above: fabricated damage has to contradict your documented baseline, and manufactured urgency has to outargue a professional who has nothing to sell you.
When is the best time of year for a roof inspection?
Roofs can be inspected in any season, and an urgent concern should never wait for the calendar. But if you are scheduling a routine inspection, timing it well gets you a safer, more complete look and a less-booked inspector. Two principles drive the calendar everywhere: inspect after your region's punishing season (so the damage it caused gets found) and before the season it is most important to be sound for (so there is time to fix what turns up). Conditions matter too: walking is unsafe on frost, dew, or rain-slicked surfaces, cold shingles are brittle underfoot, and very hot afternoons scuff asphalt, so mild, dry mid-mornings are the working standard in every region.
| Region | Best windows | Why then |
|---|---|---|
| Northeast & Upper Midwest | Late spring; early fall | Spring reveals what ice dams and freeze-thaw did over winter; fall confirms the roof and the attic insulation are ready before snow. Avoid walking frosty roofs. |
| Hail Alley (Plains & Front Range) | Early spring baseline; promptly after any hailstorm | A documented pre-season baseline makes post-storm damage provable. Hail season peaks in late spring; after a storm, get your inspector up before the door-knockers arrive. |
| Southeast & Gulf Coast | Late spring, before hurricane season; late fall, after it | The pre-season look finds the loose edges and lifted tabs that wind exploits; the post-season look documents what the season did while claims windows are open. |
| Pacific Northwest | Late summer through early fall | The dry window. Moss treatment, gutter work, and repairs all want dry weather ahead of the long wet season that will exploit anything left open. |
| Desert Southwest | Fall, after monsoon and peak heat | Monsoon wind and rain plus extreme UV do the year's damage by September. Avoid summer afternoon walks; hot shingles scar underfoot. |
| California & coastal West | Fall, before the rainy season | Long dry summers hide problems that the first atmospheric river announces loudly. An October inspection beats a December emergency call. |
The regional differences run deeper than scheduling — what an inspector looks hardest at in Phoenix (heat-cycled sealants, UV-cooked boots) is different from Buffalo (ice-dam scarring, ventilation) or Seattle (moss, chronic moisture). Our regional roof lifespan atlas maps those stresses region by region. There is also an off-peak advantage worth knowing: inspectors and reputable roofers are least booked in your region's quiet season, which means faster scheduling and unhurried visits. The worst time to need an inspection is the week everyone else needs one too, which is one more argument for the baseline visit that happens on your schedule instead of the weather's.
How often should a roof be inspected?
Less often than the roofing industry sometimes suggests, and more often than most homeowners actually manage. Annual professional walk-ons for a young, sound roof are mostly unnecessary. And foot traffic itself is wear. What a roof actually needs is a cadence that tracks its age and its weather, with your own eyes doing the cheap frequent checks and professionals doing the occasional deep ones.
| When | What kind | Why |
|---|---|---|
| Years 0–10 | Your own ground-and-attic check each spring and fall | Problems this early are almost always installation defects or storm strikes, and both show up from the yard or the attic. One professional look in year 1 to catch install defects while the workmanship warranty lives is a reasonable extra. |
| Around year 10–15 | One professional baseline inspection | A documented starting condition before the years when wear accelerates, and confirmation that Zone 4 ventilation is not quietly aging the roof from below. |
| After any major hail or windstorm | Professional inspection, before any door-knocker | Storm damage is often invisible from the ground, claims are time-limited, and your own inspector's report is the antidote to manufactured-damage pitches. |
| Years 15–20+ | Professional inspection every 2–3 years; sooner if your insurer asks | This is when the repair-or-replace question takes shape and when carriers start caring about roof age. Documentation now is leverage later. |
| Buying or selling | Dedicated roof inspection alongside the general home inspection | The home inspection may view the roof from the ground. A dedicated look prevents the five-figure post-closing surprise. |
The cadence has a shape worth noticing: it is event-driven early and age-driven late. A five-year-old roof needs attention when something happens to it; an eighteen-year-old roof needs attention because time is happening to it. And the whole schedule keys off one number — the roof's age — which is exactly why establishing that number is the best pre-inspection homework there is. If you take nothing else from this section: a baseline around year 10 to 15, a look after every major storm, and a steady rhythm after 15 will catch nearly everything while it is still a repair.
How do you actually use the inspection findings?
An inspection report that gets filed unread was money spent on reassurance, not information. A good report has three distinct uses, and each turns a different part of the document into action: the prioritized findings drive repair decisions, the remaining-life range drives replacement planning, and the whole documented package drives insurance outcomes. Take them in order.
First, repairs. Translate the report's "now" items into a written scope, literally a list: replace two vent boots, re-flash the chimney's uphill side, add a kick-out at the garage wall, re-secure the northeast gutter run. Then collect contractor bids against that list. This is the single biggest practical payoff of a good inspection: bids against a defined scope are comparable line by line, while bids against "come look at my roof" are three different opinions at three different prices. The "soon" and "monitor" items get calendar dates, not contracts. A note to recheck the pale stain in twelve months costs nothing and preserves the option to act.
Second, the bigger decision. When the report shows meaningful wear or a short remaining-life range, the real question becomes whether the sensible money goes into repairs or a replacement, a decision with its own logic of repair-cost thresholds, roof age, and how long you plan to own the house, which our repair-versus-replace guide works through in full. The report's job in that decision is to keep it honest in both directions: a documented healthy attic and localized damage argue against a premature replacement pitch, while documented widespread Zone 1 wear argues against pouring repair money into a roof that is finishing regardless. Either way, the range in the report converts a scary open-ended question into a budgeting timeline with dates on it.
Third, insurance — the use homeowners most often discover too late. A dated, photographed inspection report is pre-loss documentation: proof of your roof's condition before the storm, which is exactly the evidence disputes over "that damage was already there" turn on. Reports also answer the roof questionnaires and condition inspections that carriers increasingly require at renewal for older roofs, and a documented well-maintained roof puts you in a materially better position with underwriting. The mechanics of roof age, ACV schedules, and carrier rules are covered in our roof age and insurance guide. If a claim ever does happen, the sequence matters: your documentation first, your insurer's process second, and contractor signatures last.
The report's half-life
Findings age. A report older than a year — or older than the last major storm, whichever came first — is a baseline, not a current condition. For any big decision, spend the few hundred dollars to refresh it; for insurance purposes, keep every old one, because the sequence of dated reports is itself the evidence.
Do you need a roof inspection when buying or selling a home?
A real-estate transaction is the one moment when a roof's condition converts directly into dollars on a settlement sheet, and it is also the moment most likely to produce a false sense of coverage. Buyers reasonably assume the home inspection covers the roof. It does, but home-inspector standards of practice from InterNACHI and ASHI generally require the inspector to observe and describe the roof and report its condition, not to walk it, and many roofs get observed from the ground or the eaves for good safety reasons. That is a legitimate inspection; it is just not the same thing as a four-zone examination by someone who works on roofs. The home inspection report itself usually says how the roof was observed, and that line is worth finding before you rely on the conclusions.
| Layer | What you get | When it's worth it |
|---|---|---|
| General home inspection | A described roof condition, usually observed from ground, ladder, or drone, inside a whole-house report. | Always. It is standard. Just read how the roof was observed before treating its roof section as definitive. |
| Dedicated roof inspection | A full four-zone examination and a Five-Part report from a roof specialist, typically a few hundred dollars. | Any roof older than about 15 years, any visible red flags, any tile/slate/flat roof, or any home in hail or hurricane country. |
| Roof certification | A written statement the roof should last a stated period, commonly 2–5 years, sometimes after listed repairs. | When a lender requires it, or when a seller wants to neutralize roof-age objections before listing. |
| Insurance-driven inspections | Whatever your future insurer requires to bind coverage: increasingly, condition documentation for roofs past 15–20 years; in Florida, 4-point and wind-mitigation inspections are standard on older homes. | Before closing, not after. Confirm the home is insurable at a sane premium while you can still negotiate or walk. |
For buyers, the arithmetic is lopsided: a few hundred dollars of dedicated inspection against a roof replacement that is very often the single largest near-term expense on an older home. If the report finds real issues, you have three clean paths: a price reduction, a seller-paid repair with a contractor you approve, or an escrow credit, and the written, photographed report is what makes any of them negotiable rather than arguable. Insurability deserves equal attention: a roof at the end of its documented life can be fine to live under and still be difficult or expensive to insure, which changes the true cost of the house.
For sellers, the calculus is about control. A pre-listing roof inspection costs a few hundred dollars and buys you the ability to fix or disclose on your own schedule, price the roof's condition into the listing, and defuse the mid-escrow renegotiation that a buyer's surprise finding invites. Disclosure rules vary by state, but the practical rule is simpler: anything your buyer's inspector will find, you are better off having found first. A recent report and a tidy folder of repair invoices reads as a well-kept house, because it is one.
Can you inspect your own roof?
Yes, from the ground and the attic, and those two vantage points are genuinely useful. A homeowner who spends twenty minutes twice a year on the routine below will catch most problems in the window where they are still cheap, and will know when it is time to bring in a professional. What you should not do is get on the roof. Falls from height are among the most consistently deadly home hazards there is, roofs are more dangerous than they look even to people who work on them, and untrained feet damage shingles: you can create a repair while looking for one. Every step of the routine below keeps your feet on the ground or on attic joists.
- Walk every side of the house with binoculars. Scan each slope for missing, lifted, curling, or discolored shingles; sight along the ridge and eaves for sag or waviness; look at every visible penetration and flashing line.
- Check the gutters and downspouts from a stepladder, or just the splash blocks from the ground. A growing bed of granules is Zone 1 wear you can measure with your eyes.
- Look at the ceilings and the tops of walls on the top floor, especially after wind-driven rain: new stains, bubbled paint, damp corners.
- Go into the attic with a flashlight, ideally during or just after heavy rain. Lights off for the daylight test, then sweep for stains, damp insulation, mold shadows, frost, and rusty nail tips. Follow anything suspicious uphill.
- After any big storm, repeat the binocular pass the same week, and photograph anything that changed. Date the photos.
- Write down what you saw; two lines in a notes app is enough. The comparison against last season is the actual instrument.
Know what the DIY check cannot do, so it does not lull you: it cannot feel a soft deck, test a sealant bond, judge hail bruising (which reads as nothing from the ground), or see the dead valleys and upper slopes hidden from the yard. Roof imagery help close part of that gap: dated satellite and roof imagery can show slope-level wear a yard view misses, and reading rooftops from overhead, as we do, consistently shows more wear on south-facing and penetration-dense slopes than a yard-level view suggests (how our imagery-based roof estimates work). Treat the self-check as your early-warning system: its job is not to replace the professional inspection but to tell you when to schedule one, and to make you a sharper reader of the report when it arrives. If it turns up the bigger warning signs — sagging lines, widespread curling, daylight through the deck — treat that as the cue to book the professional visit now rather than next season.
That is the whole arc of this guide: know the Four Zones, insist on the Five-Part report, apply the Who-Called-Whom Test to whoever shows up, and put the findings to work on repairs, planning, and insurance. A roof inspection done this way trades twenty years of expensive guesswork for an afternoon of documentation. When you are ready, schedule one on your own terms, with an inspector you chose.
Frequently asked questions
- How long is the inspector on site?
- Plan on 45 minutes to two hours for a typical single-family home, including the attic and a short debrief. Large, steep, or multi-level roofs take longer, and adding a drone flight or a moisture scan adds time.
- What is a fair price to pay for a roof inspection?
- Home-services cost guides such as Angi and HomeAdvisor, retrieved August 2026, generally put a paid standalone inspection at roughly $100 to $400, depending on the market, the roof's size and pitch, and the method used. Drone surveys and infrared scans push toward the top of that range or past it. Contractor inspections are usually free, because they double as repair or replacement estimates.
- Are free roof inspections legitimate?
- Often, yes. A roofing contractor inspects your roof to price a bid, which is a normal part of the business. What sorts good from bad is who called whom: an inspection you requested from a company you vetted is a reasonable way to start a repair conversation, while one offered at your door after a storm is the opening move of the most common roofing scams.
- Should a roof inspector go into the attic?
- Yes, whenever access is safe. The attic is the only place to see the deck, active leak paths, and whether ventilation actually works. If access is blocked, the report should say so plainly.
- Is a drone inspection as good as walking the roof?
- Almost, but not quite. A good drone survey photographs every slope, flashing, penetration, and edge detail in high resolution, and it is the right call on roofs too steep, high, wet, or fragile to walk safely. What it cannot do is feel a soft deck underfoot, lift a shingle tab to test the sealant bond, or probe suspect wood with a screwdriver. A drone survey paired with a thorough attic inspection closes most of that gap, which is why the two are usually sold together.
- What is an infrared roof inspection?
- A thermal scan that reads temperature differences on the roof surface to find moisture trapped underneath, since wet materials hold the day's heat after sunset while dry ones cool quickly. It is mostly used on flat and low-slope roofs and is typically done in the evening after a sunny day. On an ordinary pitched shingle roof it is rarely necessary.
- How often does a roof really need a professional look?
- For an asphalt roof: one professional baseline around year 10 to 15, another after any major hail or wind event, and then every two to three years once the roof passes 15. Your own ground-and-attic check happens each spring and fall in between. Annual walk-ons are usually unnecessary on a sound younger roof, and foot traffic is itself a form of wear.
- What should a roof inspection report include?
- Five things. First, the administrative record: date, address, weather at the time, and the method used, because a ground-only observation and a walked roof are not equivalent evidence. Second, dated photographs of every slope and every noted defect, each one tied to a location on a diagram or a description, so a stranger reading the report six months later can find the spot. Third, condition notes covering the surface, the edges, the penetrations, and the attic. Fourth, a remaining-service-life estimate given as a range, with age wear, storm damage, and installation defects clearly separated, because each of those has different money attached. Fifth, findings prioritized into now, soon, and monitor. A verbal summary is not a report, and an inspector who will not put findings in writing with photos has produced something of little value to an insurer, a buyer, or your next contractor.
- Can a roof inspector tell how old my roof is?
- They can estimate from wear patterns and installation style, but it is an educated guess with a range of several years around it. Permit records, closing documents, and dated roof imagery are far more reliable. Establish the age before the visit if you can, because an inspector who knows a roof is 18 years old reads the same curling very differently than one who assumes it is 8.
- What is a roof certification?
- A written statement, usually from a roofing contractor or inspector, that a roof should remain serviceable for a stated period, commonly two to five years, sometimes contingent on listed repairs. Lenders and buyers may require one during a home sale. Cost guides retrieved in August 2026 generally put certifications at roughly $75 to $300 plus any required repairs. It carries no warranty and is not an insurance document.
- An inspector hands me a form to sign after a storm — what am I actually signing?
- Read the heading before anything else. If it says assignment of benefits, or AOB, that form transfers your insurance claim rights to the contractor, letting them bill and negotiate with your insurer directly and, in the wrong hands, inflate or litigate the claim in your name. If it says contingency agreement, it commits you to hire that company for the work if the claim is approved, often with a cancellation penalty. If it says authorization to inspect, it may quietly include either of the above in the fine print. None of these need to be signed on the day of an inspection, and no legitimate company will lose interest because you took the form inside to read it. State regulators publish consumer alerts on exactly this pattern; your own carrier's claims line will also tell you what it does and does not require.
- Does a home inspection cover the roof?
- Yes, though often from the ground or the eaves rather than from on top of it. When you are buying a house whose roof is older than about 15 years, a dedicated roof inspection is a modest cost next to a five-figure surprise.
- Can I inspect my own roof?
- You can do a genuinely useful ground-and-attic check, and it takes about twenty minutes. Binoculars on every slope, a look at the granules collecting in the gutters and at the splash blocks, and a flashlight sweep of the attic after heavy rain will catch most of what a homeowner can catch. Photograph the same views each season so the comparison does the work for you. What you should not do is walk the roof, because falls are the real hazard and untrained feet damage shingles; you can create a repair while looking for one. Treat your own check as the early-warning system that tells you when to call a professional, not as a replacement for the visit.
Sources
- Consumer guidance on roof inspection and maintenance from the National Roofing Contractors Association (nrca.net).
- Insurance Institute for Business & Home Safety: roof condition research, hail damage assessment methods, and the FORTIFIED program.
- Insurance Information Institute explainers on roof inspections, claims handling, and contractor fraud.
- Post-storm contractor fraud and assignment-of-benefits consumer alerts, National Association of Insurance Commissioners (locate by title on content.naic.org).
- Federal Trade Commission consumer advice on home improvement and storm-repair scams.
- InterNACHI Standards of Practice, roof section (International Association of Certified Home Inspectors); locate by title on nachi.org.
- ASHI Standard of Practice for home inspections, American Society of Home Inspectors (locate by title on homeinspector.org).
- Energy Saver guidance on attic insulation and ventilation, U.S. Department of Energy.
- Angi's roof inspection cost guide, retrieved August 2026.
- HomeAdvisor's roof inspection cost guide, retrieved August 2026.
Figures reflect general industry guidance and public data, not a prediction about any specific roof. See our methodology and editorial standards.
Want a clearer plan for your roof?
Request a free, property-specific Roof Report. We call to confirm the home, explain what the findings mean, and help you sort what matters now, what can wait, and what still needs an on-site look.
Keep reading
Signs You Need a New Roof: The Complete Visual Checklist
Every sign a roof is failing, seen from the ground, the attic, a ladder, and inside the home, plus a simple triage that shows which signs need action now.
How to Choose a Roofing Contractor (Without Getting Burned)
The five checks every roofer must pass, a one-hour verification workflow, contract must-haves, deposit rules, and the red flags that mean walk away.
Roof Repair vs. Replace: How to Make the Call
Repair or replace? The age-by-damage matrix, the 30 percent rule, and a 12-question scorecard give most homeowners a clear answer, with the math shown.